Showing posts with label modelling paste. Show all posts

Thursday, 10 December 2020

AALL & Create: Warm and Cosy


 Hello!

Today for my guest DT post for AALL & Create I have a card featuring one of Janet Klein's little cuties and her puppy.


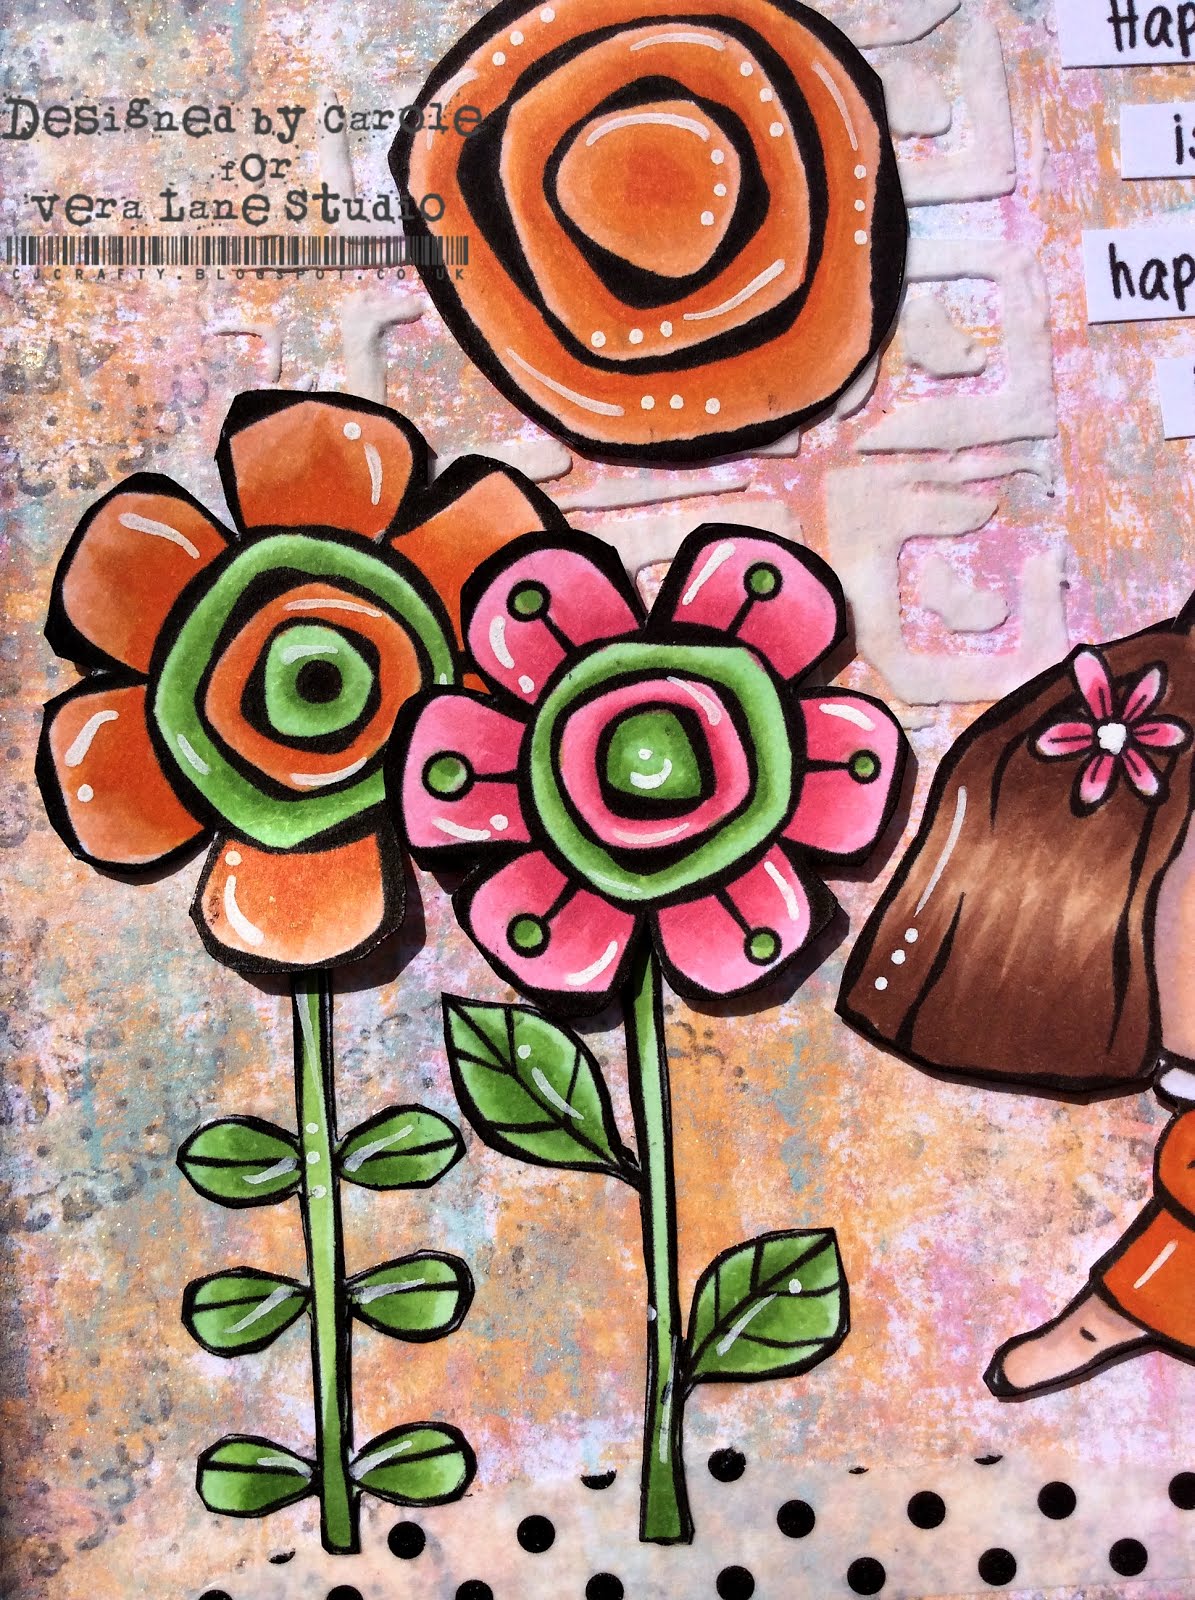
My background was made by smooshing and tapping card into Distress Oxides. Next I applied texture paste through stencil #114 Art, picking out the flower blossom shapes to replicate snowflakes. I added texture paste randomly to the base of the card. Whilst the paste was still wet, I sprinkled some holographic glitter onto it.


Next, I added some tone on tone stamping to the background using Janet's  #338 Background Noise stamp set. I also added some black stamping, using #404 Visual Ingredients, to the edges of the background to frame it.


The elements from stamp set #426 Warm and Cozy were stamped onto smooth white card with Memento ink. These were then coloured with Copic markers and fussy cut.


The images were popped on foam tape and onto the background along with the sentiment which I cut into strips and edged with black ink.
I matted the image onto black card, then on to glitter card and popped it onto a blank card base.


Stamps used:
#338 Background Noise
#404 Visual Ingredients
#426 Warm & Cozy
Stencil used:
#114 Art

To see the stamps, stencils and dies used, please visit 
A list of stockists can be found here.

You'll find lots of inspiration on the 

That's all for now.
Thanks for stopping by today.
xoxo

I'd like to play along in these challenges:

Simon Says Stamp Let It Snow 16/12
The Sisterhood of Crafters Christmas/Winter 20/12
Creative Moments #204 AG 20/12
Crafty Calendar Christmas 28/12
Corrosive Challenges Dec AG 31/12
Dare 2 B Artzy Holiday Fun 31/12
Lets Craft and Create #166 AG 31/12

Thursday, 13 August 2020

AALL & Create: Piggy Bank


Hello!

For my AALL & Create guest post this week I have made a Piggy Bank. The Piggy Bank started out as a wooden money box from the kiddies craft section of a local store.

The front:


I used the fabulous Janet Klein stamps for my focal images and for the ephemera flowers and grasses, along with a stencil from Autour de Mwa to make the stonework for the building. The roof is made from scalloped 'tiles' which are really a border stamp in one of Janet Klein's sets, #300 The Adventurer.

The back:


Sides:

Step by Step:

1.  Gesso the bare wooden money box.
2.  Remove the roof. Apply modelling paste through #55 Crazy Paving stencil.
3. Colour with paints and add shading with NeoColour II crayons.

4. Stamp the scalloped border from set #300 Look Cute several times with Vintage Photo onto kraft card.
5. Fussy cut the scalloped borders and glue to the roof, overlapping each layer.
6.  Stamp and colour the piggies from stamp set #345 Bacon.


7.  Stamp grass and flowers from #296 Wild and Free, colour and fussy cut.
8. Stamp flower from set #297 Simple but Significant and the bunny from set #354 Bunny and Bunnies; colour and fussy cut.
9. Adhere all images to the walls of the Piggy Bank. Add the printed words 'Piggy Bank' to a frame and attach. Glue roof back onto walls.
***
Janet Klein Stamps
#296 All Good Things
#297 Simple but Significant
#300 Look Cute
#345 Bacon
#354 Bunny and Bunnies

Stencil by Autour de Mwa
#55 Crazy Paving

To see the stamps, stencils and dies used, please visit 
AALL & Create Boutique.

You'll find lots of inspiration on the 
AALL & Create Facebook Page  and on Instagram

That's all for now.
Thanks for stopping by today.

xoxo

I'd like to play along in these challenges:
We Love 2 Create #8 AG Mixed Media 20/08
All Fun Challenges #13 AG 22/08
A Perfect Time to Craft AG 27/08
Classic Design Challenge AUG AG 28/08
Not Just Cards Aug AG 14/09


***

Monday, 23 December 2019

* Vera Lane Studio: Snuggle Up


Hello! 
Happy Monday!

We're almost there! 
I hope that you have a wonderful Christmas time if you celebrate!

Today is my DT day at Vera Lane Studio. I have made a card with an older winter set called Snow Day:


I love this cute girl and her snowman! I coloured them with Copics and fussy cut them, running a black marker around the edges to mask my cutting imperfections.
The background is Infusions and Brushos with white Posca paint pen splatters. I added texture paste to the bottom of the card and whist it was wet sprinkled some crystal snow on top. The edges of the background are inked with black archival ink.
The characters are popped on foam dots and the sentiment was cut, inked along the edges and glued to the background.


Snow Day


I hope you'll come along and play on Vera Lane.
It's such a friendly, fun place to be!


Thanks for stopping by today.

xoxo

I'd like to play along in these challenges:
Allsorts Challenge #551/2 AG 03/01 TOP 5
Lil Patch of Crafty Friends #120 AG 04/01
613. Avenue Create #228 AG 04/12 TOP ROCKER

Dare2bArtzy Holiday Hun 05/01
A Pace to Start Happy Holidays 05/12
Dream Valley #216 Christmas 06/01
Jan's Digi Stamps Challenges #4 AG 06/12
Christmas with the Cuties #34 Christmas 13/01


***

Monday, 18 November 2019

* Artsystamper: Give Thanks

Hello! 
Happy Monday!


Today sees the start of a new challenge at the new Artsystamper Challenge Blog. Each challenge runs for two weeks and starts on the first and third Monday of the month. 
The theme for this challenge is Give Thanks
I hope that you can find time to join in the fun!

The winner will receive the stamp set of their choice from TheArtsystamperShop. Beverly Cole’s selections offer stamps and sentiments in each set as well as pre-colored images for easy, last minute cards. Why not take a moment and check out what she has in store!

I used the beautiful Sketched Spring Blossoms Digital Stamp Set for my two cards.

The first card is perhaps a more elegant design with matted layers, lace and ribbon.


The background is made by brayering Antique Linen and Worn Lipstick Distress Oxides onto 300 gsm smooth card, making the edges darker than the centre. To tone the pink down a little I added a small amount of Victorian Velvet around the edges. I watered down some white chalk paint and spattered them onto the backgrounds with a fan brush. I then added some script stamping along the side edges and inked all the edges in black archival ink.
The next part was a learning curve! I wanted to add some modelling paste through a stencil, but I wanted the paste to stay white, rather than pick up the inks. I applied Distress Glaze, then added the paste using a stencil. What I learned was that the paste does not stick permanently to the card - as it dried, and as I turned the card over, it began to fall off - it may be because I didn't wait long enough for the Glaze to dry or, it may be that the Glaze isn't the right surface for paste to stick to - the chemistry is all too much for me!
The beautiful blossom spray was coloured with Copic markers and fussy cut. I added a strip of ivory lace across the bottom portion of the background, then popped the blossoms on foam pads and adhered it to the background. I added a pink bow to the base of the blossom branch.
The sentiment was typed, printed, then die cut with a banner die; the fish tail was shortened to make it into a rectangle. The sentiment was also popped on foam pads.
The final stage was to mat the background, first onto black card and then onto pink card. All was adhered to a 6 x 6 inch white card.


***

***

My second card uses the same colours and background techniques, but is more modern or artsy.


The background was made in exactly the same way as above. The Copic coloured blossom was added to the centre on foam pads, with the sentiment, placed on foam pads, below. Three sequins add a little sparkle.


Sketched Spring Blossoms Digital Stamp Set


That's all for today! 
I hope you will hop on over to Artsystamper Digitals Challenge Blog and enter! You will also see more inspiring designs from the Artsystamper Addicts Design Team ... so much fun.

I'll be back with another Artsystamper project in two weeks time.

Meanwhile, please check out:
Artsystamper Digitals Challenge Blog

Thank you for stopping by today!


I'd like to support the following challenges:

Card 1
Aud Sentiments #240 Thank You Sentiment 25/11 Top 3

Crafty Creations #402 AG 26/11
Fusion Card Challenge Thankful 26/11
613 Avenue Create #227 AG 29/11
Dream Valley #214 Favourite Colour Combo 30/11
Corrosive Challenges #11 AG 30/11
Lil Patch of Crafty Friends #118 AG 30/11
Crafters Castle #23 AG 30/11
Dare 2 B Artzy Nov Thankful 30/11
Path of Positivity #74 Thankfulness 01/12 TOP PICK & MOST INSPIRING

  
Jan's Digistamps Challenges #2 AG 01/12
Brown Sugar #295 AG 02/12

Card 2
Crafty Catz #483 AG 21/11
Cardz TV #102 AG 21/11
Always Fun #137 Thanks 23/11 TOP 3

Pammies Inky Pinkies #1946 AG 24/11
Crafty Cardmakers #245 Thankful 24/11 WINNER

Crafting with an Attitude #57 AG 24/11
Crafting by Designs AG 27/11
Crafty Calendar Cute & Girly 28/11
Creative Fingers #175 AG 29/11


***

Monday, 26 August 2019

* Vera Lane Studio: Teacher ATCs


Hello and Happy Monday!

It is my DT day at Vera Lane Studio and I have 2 ATCs to share featuring the Teachers 2

Here are my ATCs:


I'm pretty sure we have the weekend teacher and the same Monday to Friday teacher in this set. My images are coloured with Copics and fussy cut.  The background is brayered Distress Oxide in Picked Raspberry and Wilted Violet with modelling paste applied through a stencil. As the  paste picked up some of the Distress Oxide colour, I applied white Posca pen over some of the circles. A little black stamping and some white paint splatters finish off the background. The teachers were adhered to the ATCs on foam tape with black and white, polka dot washi to ground them. I completed the ATCs with a hand drawn, scribbly line, black border.

Teachers 2


I hope you'll come along and play on Vera Lane.
It's such a friendly, fun place to be!


Thanks for stopping by today.
xoxo

I'd like to play along in these challenges:
Dragonfly Dreams No Patterned Paper 28/08
Simply Create Too #152 AG 30/08
Angies Digital Stamps #34 Back to School 30/09
Always Fun #125 Back to School 01/09 TOP 3

Polkadoodles #34 AG 02/09
ALL Sorts #5345 Feminine 06/09
Creations in Pink #1`3 Mainly Pink 13/09


***

Monday, 22 July 2019

Vera Lane Studio: Flower Lover


Hello!

It's my DT day over at Vera Lane Studio today. Janet has a new released out today called Flower Lover. It comprises of two adorable girls and one lovely sentiment.

I used the girl with the bouquet and the sentiment to create my project and I teamed her with some of the Floral Burst images that were released last Tuesday. Here is my card:


As usual, I coloured my images with Copic markers and added some white Posca pen highlights. I fussy cut the images and ran a black marker around the edges.
The background is brayered with PaperArtsy chalky acrylic paints in Butternut, Candy Floss and Mermaid. I added some Snowflake to tone the colours down, then spritzed some Glimmer Mist over the entire background.  Modelling paste was added through an AAll & Create Stencil (#59) and some Flanel Grey stamping added mainly to the edges of the background. The edges were inked with black archival ink.


I tore some polka dot washi tape to ground the images, then glued the orange flower directly onto the background, leaving the petals free. I popped the pink flower head on foam pads. The bouquet girl is also raised on foam pads. I used one of the Flower Burst flower head images as a sun. Finally, I cut the sentiment into strips and glued to the background. 


Flower Lover                Floral Burst
      
I hope you'll come along and play on Vera Lane.
It's such a friendly, fun place to be!


Thanks for stopping by today.
xoxo

I'd like to play along in these challenges:

PIP Challenge #1929 AG 29/07
Lemon Shortbread #98 AG 29/07
Polkadoodles #29 AG 29/07 DT Favourite

Creatalicious #167 AG 31/07
Love to Scrap #123 AG 31/07
Love to Craft #36 AG 31/07
Get Creative #82 AG 01/08
Cutie Pie Challenge #137 Girls Just Wanna Have Fun 06/08
Creative Inspirations July AG 06/08
Crafty Creations #395 AG 13/08


***